Expert Tips for Roof Installation Manchester NH Homeowners Need to Know

Manchester nh roofers

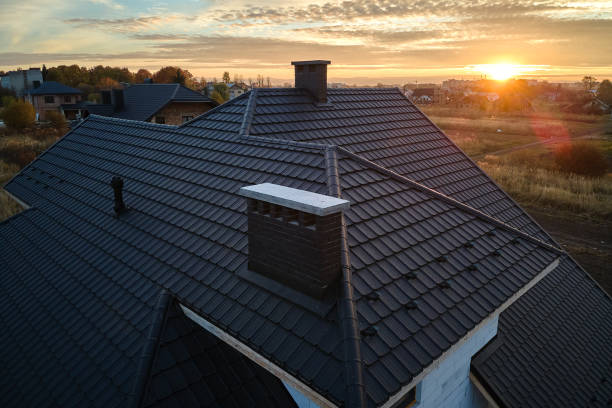
As one of the most critical components of a house, the roof protects against harsh weather conditions while contributing to your property’s aesthetic appeal and energy efficiency. Below is an overview of essential considerations homeowners should keep in mind when dealing with roofing projects.

Assessing Your Roofing Needs

Before starting any roofing project, it’s vital to assess what your home requires.
– Is your roof damaged and in need of repair?
– Does it require a complete replacement due to age or wear?
– Are you looking to upgrade the style or improve the functionality of your roof?

By answering these questions, you can determine whether you need repairs, partial replacement, or an entirely new roof installation.

Key Factors When Planning Roof Work

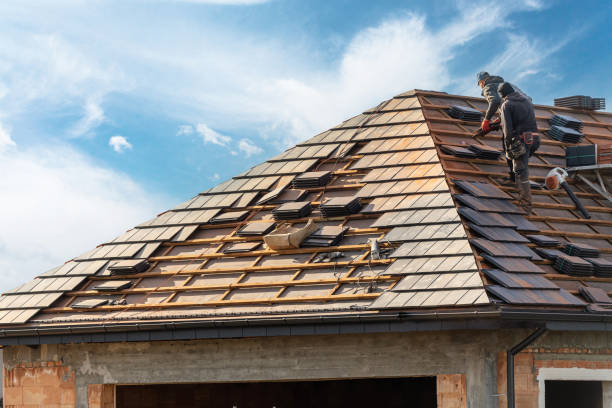
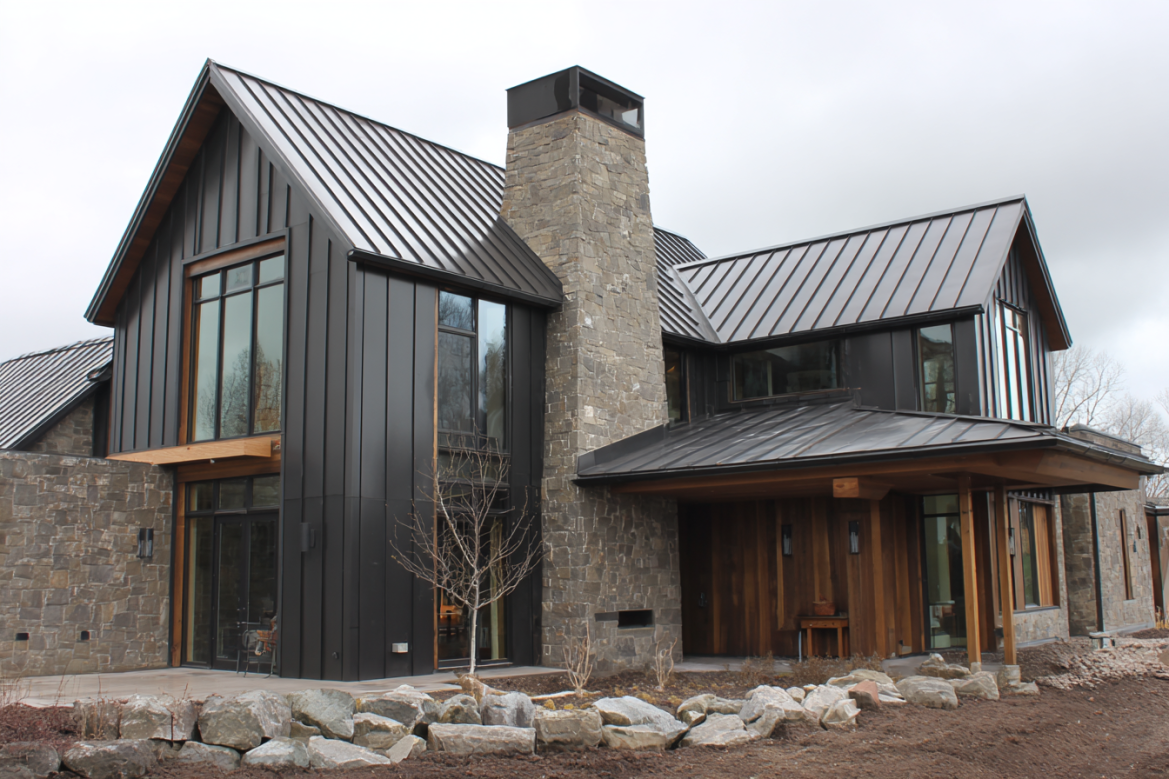
  1. Roof Material Options
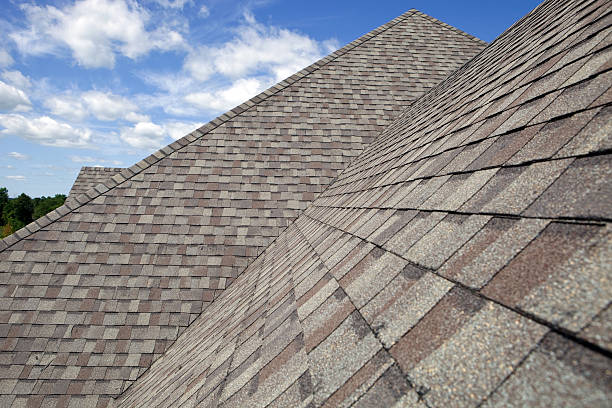
    Different materials offer varying lifespans, costs, and benefits.
  2. Asphalt Shingles:Affordable and widely used but with a shorter lifespan (15–30 years).
  3. Clay Tiles:Long-lasting and aesthetically appealing but heavy and costly.
  4. Slate Roofing:Extremely durable but requires significant structural support due to its weight.
  5. Weather Conditions
    Choose an appropriate time for roof work based on weather patterns in your area. Avoid scheduling projects during rainy or snowy seasons as this can delay work or compromise its quality.
  6. Energy Efficiency Considerations
    Modern roofing materials often include energy-saving features such as reflective coatings that help reduce cooling costs by reflecting sunlight away from the home.
  7. Budget Planning
    Roofing is a major investment; plan your budget accordingly by considering material costs, labor expenses, and potential additional charges for permits or structural modifications.

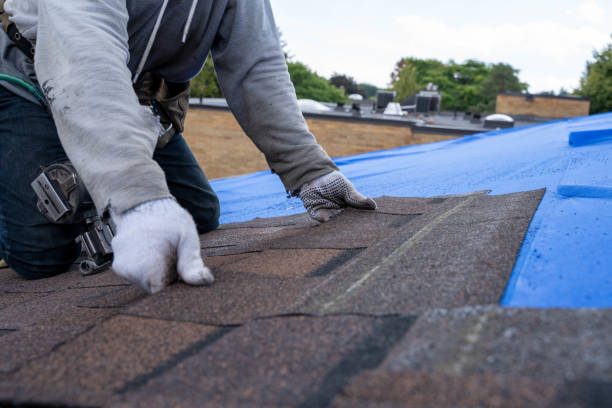
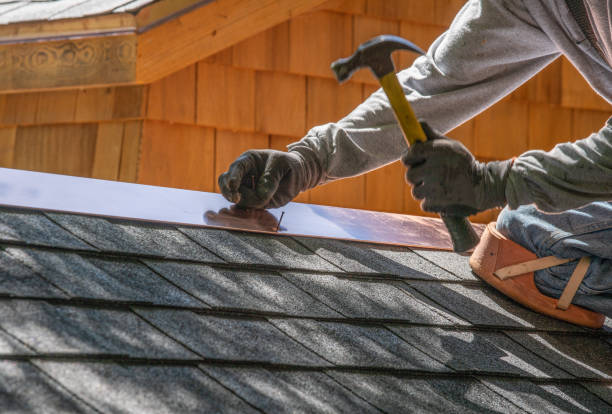
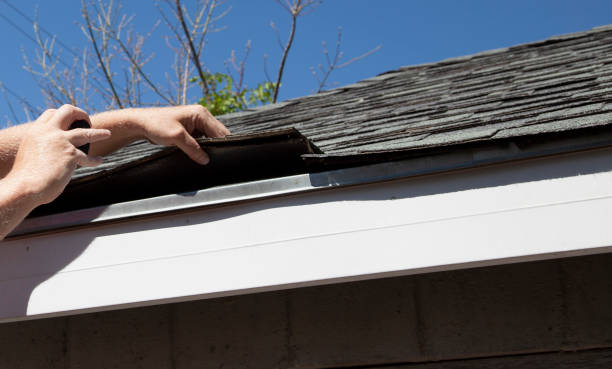
Hiring Professional Roofers

  • Look for licensed contractors such as www.manchesterroofing.net with experience specific to the type of material you’re using.
  • Ask for references and reviews from previous customers.
  • Obtain multiple quotes from reputable companies to ensure competitive pricing.
  • Confirm that they provide warranties on their workmanship and materials.

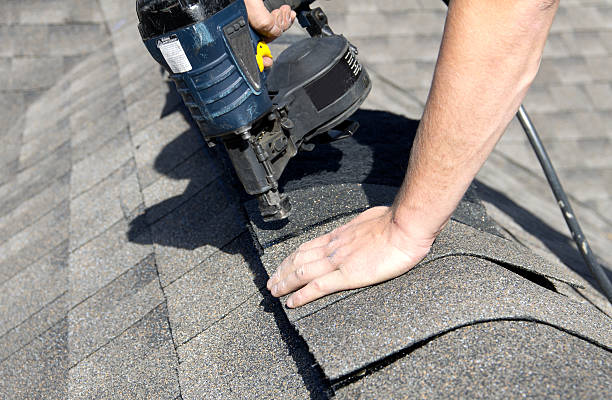
Common Pitfalls to Avoid

  • Avoid choosing materials solely based on price; cheaper options may lead to higher long-term maintenance costs.
  • Don’t skip regular inspections; this helps identify minor issues before they become major problems.
  • Ensure proper ventilation; poor airflow can affect energy efficiency and lead to moisture buildup inside your attic.

Comparative Table of Roofing Materials

Material Average Lifespan Cost per Square Foot Notable Advantages Potential Drawbacks
Asphalt Shingles 15–30 years $1–$5 Affordable & easy installation Shorter lifespan
Metal Roofing 40–70 years $5–$12 Durable & energy-efficient Higher upfront costs
Clay Tiles 50+ years $8–$25 Aesthetic appeal & longevity Heavy & expensive
Slate Roofing 75+ years $10–$30 Extremely durable Requires strong structural support

Understanding these key elements will help homeowners make informed decisions about their roofing needs while ensuring long-term performance and value.

Understanding Manchester NH Roofing and When You Might Need Planning Permission

When planning roof work, many homeowners wonder whether planning permission is necessary. The answer depends on the type of work, the extent of alterations, and local regulations. Understanding when and why you might need planning permission is essential to avoid legal complications and ensure your project runs smoothly.

Understanding When Roof Replacements Manchester NH Require Planning Permission

Planning permission is typically required for roof projects that significantly alter the structure or appearance of a building.

  1. Raising the height of your roof to create more headroom or add an additional story generally requires planning approval since it alters the overall appearance of your property.
  2. Installing dormer windows or large skylights may fall under permitted development rights if they meet specific conditions (e. g. , not higher than the existing roofline). However, for larger modifications, permission will likely be necessary.
  3. Converting a flat roof into a pitched one or altering its overall shape can change the visual profile of your home and may require approval from your local authority.
  4. Homes in conservation areas, areas of outstanding natural beauty (AONBs), or listed buildings often face stricter rules regarding external changes like roof alterations. Even minor adjustments might necessitate formal permissions in these cases.
  5. For businesses making modifications to their roofs, including installing signage or solar panels, applications often need to be submitted for approval.

Why Planning Permission is Necessary

Planning permission ensures that construction projects comply with local regulations designed to preserve the environment, community aesthetics, and building safety standards.

  • Preserving Aesthetics:Local councils aim to maintain uniformity within neighborhoods by regulating drastic architectural changes.
  • Safety Concerns:Approval ensures that proposed structural changes meet safety codes.
  • Environmental Considerations:Modifications should not impact protected wildlife habitats (e. g. , bats) or disrupt natural drainage systems.

Permitted Development Rights

Some smaller roof projects may fall under “permitted development rights,” which allow certain works without formal application for planning permission:
– Adding small skylights that do not protrude excessively – Repairing an existing roof without altering its height or shape – Using materials similar to the original structure

However, it’s important to verify these rights with your local council before proceeding since rules can differ based on location.

Scenario Planning Permission Required?
Repairing/Replacing Original Roof No
Installing Large Dormer Windows Yes
Adding Solar Panels Sometimes
Changing Flat Roof to Pitched Yes
Extending Roof Height Yes

Steps to Obtain Planning Permission

  1. Consult with a qualified architect or roofer familiar with local regulations.
  2. Contact your local council’s planning department for advice.
  3. Submit detailed plans outlining proposed changes along with any supporting documentation.
  4. Allow time for review – applications can take several weeks depending on complexity.

By understanding these requirements upfront and seeking proper approvals where needed, homeowners can ensure their project proceeds without delays or unexpected complications.

When and Why You Might Need Planning Permission for Your Roof

When it comes to roof modifications or installations, understanding whether planning permission is required can save homeowners time, money, and potential legal complications. While not all roofing projects demand planning permission, certain criteria and circumstances necessitate it. Here’s what you need to know about when and why planning permission might be required for your roof project.

Situations That Typically Require Planning Permission

Not all roofing projects are straightforward.

  • Significant Alterations to Roof Shape:
    If you’re altering the structural shape of your roof—for instance, converting a flat roof into a pitched one—planning permission is often required because this change affects the external appearance of your property.
  • Additions Such as Dormers or Roof Extensions:
    Adding dormer windows or extending the roof significantly beyond its current dimensions generally requires approval. This is especially true if the new design impacts neighboring properties or exceeds height restrictions in your area.
  • Properties in Designated Areas:
    Homes located in conservation areas, national parks, or areas of outstanding natural beauty have stricter rules regarding changes to external appearances. Even minor alterations may demand planning consent to ensure harmony with the local environment.
  • Listed Buildings:
    If your property is listed under historic preservation laws, nearly any change to its exterior will need approval from local authorities to maintain its character and historical value.

Why Planning Permission Is Necessary

The purpose of requiring planning permission for specific projects extends beyond bureaucracy.
Maintain Visual Harmony: Local authorities aim to preserve the visual aesthetics of neighborhoods by regulating significant changes to architectural features like roofs.Protect Neighboring Properties: Large-scale alterations might affect a neighbor’s access to sunlight, privacy, or overall enjoyment of their property.Environmental Considerations: New construction might have ecological impacts that need assessment before proceeding.Structural Safety Checks: Depending on the nature of the project, adherence to building regulations (often tied closely with planning permissions) ensures new additions meet safety standards.

Exemptions from Planning Permission for Roofing Projects

In some cases, roofing work may fall under permitted development rights (PDR), meaning no formal application is needed.

  • Repairs or maintenance that do not alter the height or structure of your roof.
  • Re-roofing using materials similar in appearance to those currently in use.
  • Adding solar panels within specified size limits and without significant protrusion above existing structures.
Type of Project Requires Planning Permission?
Minor repairs/maintenance No
Replacing like-for-like tiles No
Installing dormer windows Yes (if outside PDR specifications)
Changing flat roof to pitched Yes
Altering structure in conservation area Yes

Steps To Determine If You Need Permission

  1. Consult Local Authorities:Always begin by contacting your local council’s planning department for advice tailored specifically to your area.
  2. Research Online Resources:Many councils now provide online tools that allow homeowners to check whether their project falls within permitted development rights.
  3. Hire a Professional:Architects or experienced builders familiar with local laws can guide you through necessary approvals efficiently.

Being proactive about understanding and adhering to planning requirements ensures your roofing project proceeds smoothly while avoiding costly penalties down the line. It’s always better to seek clarification before starting any work than face enforcement actions later on.

Understanding Roofing Contractor Manchester NH: Types of Roofs and Their Planning Permissions

When considering changes or upgrades to a roof, understanding the types of roofs and their associated planning permissions is essential. Different roofing styles can have varying impacts on the visual landscape, local regulations, and even wildlife habitats.

Common Roof Types

  1. Description: Simple in design with minimal slope, used for modern homes or extensions.
  2. Planning Permission: Generally, flat roofs don’t require planning permission if they fall within permitted development rights. However, height restrictions usually apply (e. g. , no higher than 2. 5m at eaves level for most cases).
  3. Considerations: If converting a pitched roof to a flat one, ensure it doesn’t overlook neighboring properties or impact drainage systems.
  4. Description: The traditional sloped roof design seen on most homes in the UK or US.
  5. Planning Permission: Often exempt under permitted development unless altering the height of the roof or making structural changes that affect external appearance significantly.
  6. Considerations: If adding dormer windows as part of a pitched-roof extension, specific permissions might be needed.
  7. Description: A single-sloped structure typically added over porches or smaller extensions at the rear of homes.
  8. Planning Permission: Usually doesn’t require permission under permitted development rules unless it exceeds specified dimensions (e. g. , depth exceeding 3m for attached houses).
  9. Considerations: The lean-to should match existing materials to blend into property aesthetics.
  10. Description: A dual-pitched design where all sides slope steeply before flattening out near the top for increased attic space.
  11. Planning Permission: Almost always requires planning permission due to its pronounced impact on building height and local skyline changes.
  12. Considerations: Mansard conversions are common in urban areas but may face restrictions in conservation zones.
  13. Description:Eco-friendly roofs designed with vegetation layers to support insulation and sustainable drainage.
  14. Planning Permission:Typically does not require special permissions unless accompanying structural alterations or major renovations.
  15. Considerations:Check local policies supporting ecological initiatives; some councils encourage green roofs with incentives.

Height Restrictions

  • Most regulations focus on maintaining harmony with surrounding structures by restricting maximum ridge heights.

Property Location

  • Conservation areas, listed buildings, and national parks are subject to stricter controls regarding roofing changes, often requiring additional approvals.

Overlooking Neighbors

  • Any modifications impacting privacy—such as raising roofs significantly—might need written neighbor consent along with council approval.

Quick Reference Table

Type of Roof Planning Permission Needed? Notes
Flat Roof No (if within permitted dimensions) Ensure height does not exceed 2.5m near boundaries
Pitched Roof No (for minor repairs/extensions) Permissions required for major structural changes
Lean-to No (if depth < 3m) Match existing materials
Mansard Yes Significant visual impact likely
Green/Biodiverse No Check incentives for eco-roofs locally

Understanding these considerations will help homeowners plan their roofing projects responsibly while adhering to local regulations. It’s advisable to consult your local council’s planning department if there is uncertainty regarding specific requirements before starting work.

Types of Roofs and the Planning Permissions They Require

When undertaking roofing projects, understanding the types of roofs available and their associated planning permission requirements is essential for homeowners. Roof structures can significantly impact the aesthetics and functionality of your property, but they also need to comply with local regulations. Below is a guide to various roof types and the planning permissions they might require.

Common Types of Roofs

  1. Description: Flat roofs are horizontal or nearly horizontal structures with a slight pitch for water drainage.
  2. Use Cases: Frequently used in modern designs, extensions, garages, and outbuildings.
  3. Planning Permission: Typically, planning permission isn’t required for flat roofs unless:
    • The height exceeds 2. 5m within 2 meters of a property boundary.
    • The structure significantly alters the appearance of the property.
  4. Description: A gable roof features two sloping sides that meet at a ridge, forming a triangular end wall.
  5. Use Cases: Common in residential properties due to their classic design and practicality.
  6. Planning Permission: Usually not needed unless:
    • You’re increasing the building height significantly.
    • The changes impact neighboring properties or existing rooflines.
  7. Description: A hip roof slopes on all four sides, meeting at a ridge at the top.
  8. Use Cases: Popular in areas prone to high winds or heavy snowfall due to their sturdiness.
  9. Planning Permission: May require permission if it alters your property’s overall silhouette or is part of a listed building.
  10. Description: Mansard roofs have two slopes on each side; the lower slope is steeper than the upper one, creating additional living space inside.
  11. Use Cases: Ideal for maximizing usable attic space or adding character to older properties.
    • Often required as these structures alter roof height substantially.
    • May need approval if it impacts neighboring views or heritage areas.
  12. Description: Lean-to roofs are single-sloped structures that “lean” against another wall or building for support.
  13. Use Cases: Commonly used for small extensions such as porches or conservatories.
  14. Planning Permission:
    • Not usually required if within permitted development rules (e. g. , specific size limits).
    • Necessary if exceeding height limits specified by regulations.

Key Factors Influencing Planning Permissions

  • Property location (e. g. , conservation areas often have stricter rules).
  • The proximity of alterations to neighbors’ boundaries.
  • Whether your property is listed or located in an Area of Outstanding Natural Beauty (AONB).
  • Structural changes that increase overall height or volume beyond set thresholds.

Table Summary of Planning Permissions by Roof Type

Roof Type Typical Planning Requirement Notes
Flat Roof Rarely required Height limits may apply
Gable Roof Occasionally needed Impact on neighbors significant
Hip Roof May require permission Adds visual bulk
Mansard Roof Often required Alters height/shape drastically
Lean-to Roof Usually not needed (permitted development) Depends on extension size/height

Tips for Navigating Planning Permissions

  • Consult your local authority early in the process to clarify requirements specific to your area.
  • Hire an architect familiar with local guidelines for compliant designs.
  • Consider applying for pre-planning advice if unsure about large-scale projects.

Understanding these aspects aids in avoiding delays and penalties while ensuring compliance with regulations surrounding roofing projects.

Can a Roofer Manchester NH Change a Flat Roof to a Lean-to Roof Without Planning Permission?

When considering changes to your roof, one of the most common questions is whether you can convert a flat roof into a lean-to roof without planning permission. The answer largely depends on your location, local planning regulations, and the specific nature of the project. Below, we’ll explore key factors that influence this process and what homeowners need to consider before starting such a renovation.

Understanding Permitted Development Rights

In many cases, minor roof alterations fall under Permitted Development Rights(PDR), which allow homeowners to make certain changes without the need for formal planning permission.

  • The overall height of the new structure does not exceed 4 meters for detached properties or 3 meters for semi-detached/terraced houses.
  • The alteration does not extend more than 200 millimeters beyond the plane of the existing roof slope (measured externally).
  • The materials used are similar in appearance to those used in the original construction.
  • The modification does not obstruct public roads or footpaths.

It’s crucial to verify that your property qualifies under PDR since rules vary depending on whether you’re in an urban area, rural location, or conservation zone.

Situations That Require Planning Permission

There are circumstances where planning permission will likely be required for your project.

  • Significant Height Increase: If converting the flat roof involves raising its height significantly, you’ll need approval.
  • Listed Buildings: Alterations on buildings with listed status require special permissions.
  • Conservation Areas: Properties within conservation areas often have stricter guidelines on external appearances.
  • Impact on Neighbors: If your change affects neighboring properties—such as blocking sunlight or altering views—formal permission may be necessary.

Check with your local council or governing body for clarity on these exceptions.

Steps to Determine Next Actions

  1. Consult Local Authorities: Contact your local planning department or visit their website for detailed guidance.
  2. Hire an Architect or Builder: Professionals familiar with local regulations can assess whether permissions are required and help with paperwork.
  3. Conduct Pre-Application Enquiries: Many councils offer pre-application advice services where planners provide feedback before formal submission.
  4. Survey Your Property Boundaries: Check whether any shared walls or adjacent spaces could complicate your project.

Advantages of a Lean-to Roof Conversion

  1. Improved drainage due to sloped design.
  2. Enhanced durability compared to traditional flat roofs, which are prone to water pooling and leaks.
  3. Aesthetic appeal—lean-to designs often complement traditional architectural styles better than flat roofs.
Feature Flat Roof Lean-To Roof
Drainage Poor Excellent
Aesthetic Appeal Modern but less versatile Blends well with various designs
Maintenance Requires frequent upkeep Fewer long-term issues

Final Thoughts

While it’s tempting to undertake this upgrade without seeking proper advice, ensure all legal requirements are met beforehand. Understanding whether you fall under Permitted Development Rights will save time and avoid potential fines associated with unauthorized changes. Prioritizing professional advice and adhering strictly to local regulations ensures you achieve both functional improvements and peace of mind during your project.


The Importance of Hiring a Professional Roofer Manchester NH for Proper Roof Installation

New Shingled Roof with Blue Sky Background  roofing stock pictures, royalty-free photos & images

Proper roof installation is one of the most critical aspects of safeguarding your home. A roof acts as the primary defense against weather elements, provides structural integrity, and contributes to energy efficiency. Ensuring a well-installed roof not only protects your property but also enhances its long-term value.

Key Benefits of Proper Roof Installation

  • Protection Against Leaks and Water Damage:
    Poorly installed roofs are prone to leaks, which can result in costly water damage to ceilings, walls, and insulation. A proper installation creates a watertight barrier against rain and snow.
  • Energy Efficiency:
    An improperly installed roof can lead to heat loss in the winter or excess warmth in the summer due to poor ventilation and insulation. On the other hand, proper installation ensures better energy efficiency by minimizing unwanted air exchange.
  • Longevity:
    A properly installed roof maximizes the lifespan of roofing materials. This means fewer repairs or replacements over time, saving you money in the long run.
  • Enhanced Curb Appeal:
    Beyond functionality, a well-installed roof improves your home’s appearance. Clean lines, uniform shingles, and high-quality craftsmanship enhance curb appeal for potential buyers if you decide to sell.

Common Issues Caused by Poor Installation

  1. Premature Aging of Roofing Materials
    Inadequate nailing techniques or poorly aligned shingles can cause materials to degrade faster than expected.
  2. Water Intrusion
    Gaps or misaligned flashing allow water seepage into vulnerable areas such as chimneys or skylights.
  3. Sagging Rooflines
    Insufficient support during installation can create dips or uneven surfaces on a newly installed roof.
  4. Mold Growth
    Improper sealing often leads to moisture buildup within insulation layers—creating an ideal environment for mold.

Steps to Ensure Proper Roof Installation

  1. Hire Licensed Roofing Contractors: Always work with licensed professionals who have verified expertise in roofing systems.
  2. Choose High-Quality Materials: Ensure your contractor uses durable materials suited for your home’s climate.
  3. Inspect Underlayment Installation: Proper underlayment ensures water resistance beneath shingles.
  4. Verify Flashing Placement: Flashing around vents, chimneys, and valleys should be securely sealed.
  5. Confirm Ventilation Systems Are Adequate: Adequate ventilation helps prevent heat buildup and protects against condensation issues within attic spaces.

Recommended Maintenance After Installation

Maintenance Task Frequency Reason
Inspect for loose shingles Twice a year To address potential entry points for water damage
Clear gutters Quarterly To prevent water backup onto roofing materials
Check flashing seals Annually To ensure no gaps develop over time
Remove debris regularly As needed To avoid accumulation that can trap moisture

A properly installed roof not only delivers peace of mind but also represents a worthwhile investment in protecting your home’s safety, comfort, and value over time.

Identifying When Your Manchester NH Roofing Needs Replacement

Your roof plays a critical role in protecting your home from the elements, but over time, wear and tear can compromise its integrity. Recognizing when it’s time to replace your roof is essential to avoiding costly repairs and potential damage to your home. Below, we’ll explore the key signs that indicate you may need a roof replacement and why addressing these issues promptly is vital.

Essential Tips for Roof Installation Manchester NH Homeowners Should Know

  1. Asphalt shingle roofs: Typically last 20-30 years depending on quality and climate.
  2. Metal roofs: Can last 40-70 years but may still require inspection for corrosion or loose panels.
  3. Clay tiles and slate roofs: Highly durable but should be inspected for cracks or displacement after decades of use.

If your roof has surpassed its expected lifespan, even if no visible issues are present, it’s wise to consider replacing it before problems arise.

  1. Stains on ceilings or walls.
  2. Mold growth in attic spaces.
  3. Dripping water during rainfall or snow melts.

Water infiltration is one of the most apparent signs of roof failure. Small leaks often worsen over time, leading to structural damage or health hazards like mold.

  1. Damaged Shingles
    Look for:
  2. Cracked or curling shingles.
  3. Missing shingles exposing the underlayment.
  4. Granule loss visible in gutters or around downspouts.

Damaged shingles compromise your roof’s ability to protect against water intrusion and temperature regulation.

  1. Sagging Rooflines
    A sagging roofline typically indicates structural issues such as weakened decking or damaged trusses. This problem poses a significant safety risk and often necessitates immediate replacement.
  2. Daylight Through the Attic
    Inspect your attic during daylight hours to see if sunlight is filtering through the roofing boards. Visible light openings mean there are gaps in your roof that could lead to leaks and pest infestations.

The Risks of Delaying Roof Replacements Manchester NH

Postponing roof replacement can result in:
Higher Repair Costs: Structural damage caused by neglect will demand costly repairs beyond just replacing roofing materials.
Decreased Energy Efficiency: A failing roof compromises insulation, causing higher energy bills due to heat loss in winter or excessive heat gain during summer months.
Reduced Home Value: A deteriorating roof can significantly impact resale value as potential buyers factor repair costs into their offer price.

Issue Potential Consequence Solution
Leaks Water damage, mold growth Replace damaged areas
Aging materials Reduced protection from weather Full roof replacement
Sagging structure Risk of collapse Structural reinforcement & new roofing

When Professional Inspection Is Necessary

If you’re noticing any of these warning signs but are unsure about the overall state of your roof, contacting a qualified roofing contractor for an inspection is recommended. Professionals can assess:
– Underlying structural issues not visible from outside. – Moisture accumulation beneath roofing layers. – The potential lifespan remaining for aging materials.

Early detection through professional evaluations can save you money by preventing further damage while helping you plan for a timely replacement project.

By staying proactive about recognizing the signs that indicate it’s time for a new roof, homeowners ensure their property remains safe, comfortable, and energy-efficient long term—no matter what Mother Nature brings their way.

Understanding Different Roof Installation Methods and Their Benefits

Selecting the right roof installation method is essential for ensuring the durability, energy efficiency, and aesthetic appeal of your home or commercial property. Each method offers unique advantages, making it crucial to understand their differences to make an informed decision.

Common Roof Installation Methods

  1. Process: Asphalt shingles are laid in overlapping rows, secured with nails, and sealed with adhesive.
    • Cost-effective and widely available.
    • Easy to install and repair.
    • Available in various colors and styles for aesthetic flexibility.
  2. Process: Metal panels or shingles are secured using fasteners or concealed systems.
    • Extremely durable with a lifespan of 40–70 years.
    • Reflects heat, improving energy efficiency.
    • Lightweight material reduces structural strain.
  3. Process: Flat roofs typically use materials such as EPDM (rubber), TPO (thermoplastic polyolefin), or modified bitumen applied over a flat surface.
    • Ideal for modern designs and commercial properties.
    • Easy to maintain due to accessible surfaces.
    • Offers space for rooftop gardens or HVAC systems.
  4. Process: Tiles are individually installed in an overlapping pattern on top of underlayment materials.
    • Highly durable against weather extremes.
    • Provides excellent thermal insulation.
    • Adds a distinctive architectural style to homes.
  5. Process: Natural slate tiles are carefully cut and installed over a secure structure due to their weight.
  6. Benefits:
    • Long-lasting with lifespans exceeding 100 years.
    • Exceptional water resistance.
    • Luxurious appearance that enhances property value.

Choosing the Right Roof Installation Method

  • Climate Conditions: Opt for materials resistant to the specific weather patterns in your area, such as metal panels for heavy snowfall zones or asphalt shingles for mild climates.
  • Budget Constraints: While every homeowner desires the best quality roofing, some methods like slate can be cost-prohibitive compared to asphalt shingles which may offer better affordability without compromising reliability.
  • Building Structure: The weight-bearing capacity of your building’s structure determines whether heavier options like tile roofing are feasible or if lighter alternatives like metal would be better suited.

Comparative Table of Roof Installation Methods

Method Lifespan Cost Maintenance Requirements Ideal For
Asphalt Shingles 15–30 years Low Moderate Residential homes
Metal Roofing 40–70 years Medium Low Homes in extreme climates
Flat Roofing 10–25 years Medium Low Commercial buildings
Tile Roofing 50–100+ years High Low Mediterranean-style architecture
Slate Roofing 75–100+ years Very High Very Low Luxury properties

Benefits of Proper Roof Installation

  • Enhanced durability by preventing leaks and structural damage over time.
  • Improved energy efficiency through effective insulation techniques tailored to each roofing type.
  • Increased property value by elevating curb appeal and guaranteeing long-term functionality.

Carefully analyzing these factors will ensure you select the right roofing method that meets both your needs and budget while adding lasting value to your home or building project.

Roofer Construction Worker Ensuring Roof Maintenance with Security Rope professional repair construction worker man roofer working on roof maintenance safety with secure rope roofing stock pictures, royalty-free photos & images

What to Do if Your Roof Was Installed Incorrectly

Incorrect roof installation can lead to a wide range of problems, from structural damage to increased energy costs. If you suspect your roof was installed improperly, it’s essential to address the issue promptly to avoid further complications. Below, we’ll explore common signs of improper roof installation, the potential consequences, and the steps you should take to remedy the situation.

Signs of Improper Roof Installation

  • Leaks or Water Damage: Water stains on ceilings or walls may indicate gaps in roofing materials caused by improper installation.
  • Shingles Misalignment: Shingles that appear crooked, overlap incorrectly, or have inconsistent spacing can be a red flag.
  • Sagging Areas: Parts of your roof that sag could suggest inadequate support or poor material placement during installation.
  • Loose or Missing Shingles: This could point to improper fastening techniques.
  • Inconsistent Flashing: Flashing around chimneys and vents should be tightly sealed and properly aligned; otherwise, it creates entry points for water.
  • Excessive Energy Bills: If your utility costs have spiked unexpectedly, poor insulation or ventilation from an incorrect install could be contributing factors.

The Risks of Ignoring Poor Installation

Potential Risk Impact
Water Damage Leads to mold growth, structural damage, and compromised interiors
Reduced Lifespan of Roofing A poorly installed roof may need replacement far sooner than expected
Higher Energy Costs Poor insulation increases heating and cooling expenses
Safety Hazards Roof collapse risk due to weakened structural integrity

Steps to Take if Your Roof Was Installed Incorrectly

  1. Document the Issues
    Take photos and detailed notes about the problems you’re noticing. This documentation will be helpful when discussing repairs with contractors or pursuing legal action against the original installer.
  2. Contact a Professional Roofer for Inspection
    Hire a licensed roofing professional who specializes in inspections. They will assess the extent of the issues caused by improper installation.
  3. Request a Detailed Assessment Report
    Ask for a written report outlining their findings and recommended solutions. This document provides clarity on next steps while giving you leverage during discussions with contractors.
  4. Check Warranty Terms
    Review any warranties that came with your original roofing project. Many warranties may cover repairs if issues arise due to faulty workmanship within a specified time frame.
  5. Hire an Experienced Contractor for Repairs
    Work with a qualified roofer who has positive reviews and proven expertise in repairing improperly installed roofs.
  6. Consider Legal Action if Necessary
    If installer negligence is evident but they refuse accountability, legal counsel may help recover repair costs through small claims court or other avenues.

Tips for Preventing Future Issues

To avoid dealing with incorrect installation in future projects: – Research roofing companies thoroughly before hiring. – Always request proof of licensing and insurance. – Check references from past clients. – Review contracts carefully before signing.

Properly addressing an incorrect roof installation ensures safety, prolongs your home’s lifespan, and protects against costly future repairs by preventing further damage from occurring over time.

How to Choose and Work With a Qualified Roofing Contractor Manchester NH

Selecting the right roofing company is one of the critical steps in ensuring your roof is durable, functional, and visually appealing. A properly installed roof not only protects your home but also adds to its overall value. Below are guidelines to help you choose and work effectively with a qualified roofing company.

Key Factors to Consider When Choosing a Roofing Company

  1. Look for companies with several years of experience in the roofing industry. Longevity often indicates reliability and skill.
  2. Verify their expertise in handling different types of roofs, such as asphalt shingles, metal roofing systems, or flat roofs.
  3. Check if they are knowledgeable about local building codes and regulations.
  4. Ensure the company is licensed to operate in your state or region.
  5. Confirm that they carry liability insurance as well as workers’ compensation coverage to protect you from potential liabilities.
  6. Research online reviews on platforms like Google, Yelp, or Better Business Bureau (BBB).
  7. Ask for references from past customers to learn about their experiences.
  8. Pay attention to how the company handles complaints or negative feedback.
  9. Review the warranties offered on both materials and labor.
  10. A reputable company typically provides guarantees covering workmanship issues for an extended period.
  11. Request detailed quotes outlining costs for materials, labor, permits, and any additional fees.
  12. Avoid companies that provide vague estimates or pressure you into signing immediately.

Questions to Ask When Interviewing Roofing Contractors

  • What certifications or training do your employees have?
  • Can you provide a portfolio of completed projects?
  • What safety measures do you follow during installations?
  • Do you subcontract any part of the work? If so, who oversees quality control?

Working Effectively With Your Chosen Contractor

  • Set Clear Expectations: Establish timelines, payment schedules, and communication preferences upfront.
  • Monitor Progress Without Micromanaging: While it’s important to stay informed about progress, trust their expertise in executing tasks efficiently.
  • Document Everything: Keep records of contracts, receipts, warranties, and any other related documentation for reference.

Red Flags To Watch Out For

Red Flag Why It’s a Concern
No Physical Office Lack of accountability or legitimacy
Unusually Low Estimates May indicate subpar materials/workmanship
High-Pressure Tactics Pushy behavior can signal dishonesty
No Written Contract Leaves room for misunderstandings

Choosing an experienced and reputable roofing contractor can save you time, money, and future headaches. Proper communication during the process ensures your project stays on track while meeting your expectations. An investment in selecting the right partner for your roofing needs will ultimately contribute significantly to your home’s safety and value.

The Advantages of Concealed Fastener Systems for Modern Roofing Projects

Concealed fastener systems have become a popular choice in modern roofing projects due to their sleek appearance, enhanced durability, and long-term performance. These systems are characterized by hidden screws or fasteners that secure roofing panels without being visible on the surface. This design not only improves aesthetics but also protects the fasteners from external elements that could lead to wear and corrosion over time. Below is a detailed look at why concealed fastener systems are advantageous for contemporary roofing.

Enhanced Aesthetic Appeal

  • Residential properties aiming for a minimalist design.
  • Commercial buildings that want to maintain a professional exterior.
  • Architectural projects where appearance plays a critical role in design.

The absence of exposed hardware creates an uninterrupted visual flow that enhances curb appeal.

Increased Durability

  • Rainwater
  • UV rays
  • Snow and ice
  • Fluctuating temperatures

These elements can lead to rusting, loosening, or failure over time. By hiding these components beneath the roofing materials, concealed systems shield them against such risks, making them less vulnerable to wear.

Superior Weather Tightness

  • Minimizing gaps where water can seep through.
  • Providing watertight seals around joints and edges.
  • Ensuring longer-lasting protection during extreme weather conditions.

For homes in regions prone to heavy rain or snow, this feature can significantly reduce issues like leaks or water damage.

Low Maintenance Requirements

Feature Maintenance Benefit
Hidden Fasteners Reduced risk of rust or corrosion
Fewer Entry Points for Moisture Lower likelihood of leaks or water damage
Durable Materials Withstand harsher conditions with minimal care

This means homeowners and property managers can save both time and money on repairs over the roof’s lifespan.

Suitability for Solar Integration

Modern roofs are often designed with energy efficiency in mind, including compatibility with solar power solutions. Concealed fastener systems provide a stable foundation for mounting solar panels without compromising structural integrity or aesthetics. Their even surfaces make it easier to attach solar equipment securely while maintaining weatherproof performance.

Key Considerations When Choosing Concealed Fastener Systems

While these advantages make concealed systems appealing, it’s essential to work with experienced professionals who understand proper installation techniques. Poor installation could negate many benefits by introducing alignment issues or compromising structural stability.

  1. Consult Experts: Ensure your roofer has experience installing concealed fastener roofs.
  2. Choose High-Quality Materials: Opt for durable panels designed specifically for concealed applications.
  3. Consider Climate Factors: Evaluate whether this system meets your region’s weather-related needs.
  4. Evaluate Costs: While often more expensive upfront than traditional alternatives, their durability may result in long-term savings.

By taking these steps into account during planning stages, you’ll maximize the value of your investment in a modern roofing solution.

Concealed fastener systems offer both functional superiority and aesthetic advantages ideal for contemporary buildings facing diverse environmental challenges. If you’re looking to enhance your property with cutting-edge roofing solutions that combine form and function seamlessly, discussing options like this system with qualified professionals is an excellent starting point.

Work at heights. A roofer with tool belt and save harness climbing to the top of the roof. Work at heights. A roofer with tool belt and save harness climbing to the top of the roof. roofing stock pictures, royalty-free photos & images

Is Your Roof Strong Enough to Support Advanced Solar and Battery Systems?

As solar energy systems and battery storage solutions gain popularity, homeowners are increasingly considering their integration into residential properties. However, before installing these advanced systems, it’s crucial to evaluate whether your roof can support the additional weight and structural requirements. A properly prepared roof ensures the safety, efficiency, and longevity of both the roofing system and the solar equipment.

Factors to Consider Before Installing Solar Panels

  • Roof Age: If your roof is nearing the end of its lifespan, it may not be a suitable candidate for solar panel installation. Installing solar equipment on an older roof might lead to complications or require premature removal when it comes time for a replacement.
  • Roof Material: Some roofing materials are more compatible with solar installations than others. For example:
  • Asphalt shingles are commonly used because they are durable and relatively simple to work with.
  • Metal roofs are also a great option due to their longevity and ability to support mounting hardware.
  • Clay tiles or slate roofs may require specialized mounting systems due to their fragility.
  • Structural Integrity: The added weight of solar panels, racking systems, and batteries can put significant stress on your roof’s structure. It’s important for a professional roofer or structural engineer to assess whether your roofing system can handle this load.

Weight Considerations

Component Approximate Weight
Solar Panels 2-4 lbs per square foot
Mounting Racks ~1 lb per square foot
Battery Storage Systems Variable (can exceed 200 lbs/unit)

This table provides an estimate of typical weights involved in solar installations. For an accurate assessment, consult with both a roofing professional and a solar provider.

Weather Resistance

Strong winds, heavy snow loads, hailstorms, or other extreme weather conditions can place additional strain on both your roof and any attached solar panels. It’s vital that your existing roofing system can withstand such events without compromising its integrity or damaging the solar equipment.

Key aspects include: – Properly secured mounting brackets that prevent movement in high winds. – Roofing materials that resist water penetration in case of rain or snow buildup. – Adequate drainage systems around the installation points.

Steps To Ensure Your Roof Is Ready

  1. Schedule a Professional Roof Inspection
    Hire a licensed roofer who can assess structural integrity, material quality, and existing wear-and-tear that could impact installation success.
  2. Reinforce Weak Areas
    If necessary, repair any damaged sections of the roof or add structural reinforcements such as bracing before proceeding with an installation.
  3. Consider Roof Replacement Before Solar Installation (If Needed)
    For aging roofs nearing their replacement timeline (typically 15-30 years depending on material), it makes sense to replace them prior to installing any long-term equipment like solar panels.
  4. Work With Experienced Professionals
    Collaborate with qualified contractors who specialize in both roofing solutions as well as renewable energy technologies for seamless integration.

Advanced energy solutions like solar power provide significant long-term benefits for homeowners but only when combined with proper structural preparation at every stage of implementation—from inspection through installation phase supervision by experts familiar with industry best practices across all relevant fields involved directly indirectly alike responsibly professionally always.


Manchester NH roofing: Your Ultimate Guide to Estimating Costs and Materials

Roofers installing new roof on house Roofers installing new roof on house roofing stock pictures, royalty-free photos & images

When planning a roofing project, understanding the costs and materials involved is essential to avoid unexpected expenses. A roofing calculator serves as an invaluable tool for homeowners and contractors alike, enabling accurate cost estimations and material requirements. Below, we explore how to effectively use a roofing calculator and how it simplifies the process of planning your roofing project.

How to Estimate Costs for Roof Replacements Manchester NH

  • The total cost of materials
  • Labor expenses
  • Waste management costs
  • Additional expenditures like fasteners, underlayment, and flashing

By inputting basic details like roof dimensions, pitch, material type, and geographic location into the calculator, you can generate estimates tailored to your specific project.

Key Components That Affect Roofing Costs

  1. Roof Size: The larger the roof area, the more materials and labor are required.
  2. Asphalt shingles: Affordable and widely used.
  3. Metal panels: Durable but pricier.
  4. Clay tiles: High-end option with long lifespan.
  5. Roof Pitch (Slope): Steeper roofs often require additional labor due to safety considerations.
  6. Geographic Location: Labor rates and material availability vary by region.
  7. Removal of Existing Roof (if applicable): Factoring in demolition costs for old roofing materials.

Using a Roofing Calculator Effectively

  1. Measure your roof’s dimensions or use a reliable roofing area calculator (detailed further in this article).
  2. Determine your roof’s pitch using simple tools like a pitch gauge or smartphone app.
  3. Choose your preferred roofing material based on budget and style preferences.
  4. Input all values into the calculator, including any additional components such as underlayment or ridge caps.

Example Cost Estimation Table

Factor Example Input Estimated Cost ($)
Roof Area 2,000 sq ft $6,000 – $9,000
Material Type Asphalt Shingles $1 – $4 per sq ft
Roof Pitch Moderate (6/12) ~10% higher labor
Removal/Demolition Old Asphalt Roof ~$1 – $3 per sq ft
Miscellaneous Supplies Nails & Flashing ~$200 – $500

This table illustrates how even small changes in variables can significantly influence overall project costs.

Tips for Reducing Roofing Costs

  • Compare quotes from multiple contractors.
  • Purchase materials during off-season sales.
  • Opt for durable yet cost-effective materials like architectural shingles over premium options.

Final Thoughts on Roofing Calculators

A well-designed roofing calculator empowers homeowners to make informed decisions about their projects while avoiding unnecessary overspending. By accurately estimating costs through proper measurements and thoughtful inputs, you’ll save time and money while ensuring that every aspect of your project runs smoothly from start to finish.

Roofing Contractor Manchester NH: Choosing the Right Materials for Your Roofing Needs

Selecting the appropriate roofing materials for your project is a crucial step that affects not only the aesthetic appeal of your property but also its durability, energy efficiency, and long-term maintenance costs. A roofing material calculator can simplify this process by providing accurate estimates based on your specific needs. Below, we’ll explore how to choose the best materials for roofing projects and how to use a calculator effectively.

Factors to Consider When Choosing Roofing Materials

  • Climate:
    Some materials are better suited for specific weather conditions. For instance:
  • Asphalt shingles perform well in moderate climates.
  • Metal roofs are excellent in areas with heavy snowfall due to their ability to shed snow easily.
  • Clay tiles offer durability and heat resistance in warmer regions.
  • Roof Pitch:
    The slope or pitch of your roof influences material choice. For example:
  • Flat or low-slope roofs often require membrane materials like EPDM or TPO.
  • Steeper slopes can accommodate shingles, tiles, or metal panels.
  • Budget:
    Different materials vary significantly in cost per square foot: | Material | Average Cost (Per Square Foot) | |——————-|——————————-| | Asphalt Shingles | $1 – $5 | | Metal Roofing | $5 – $14 | | Clay Tiles | $6 – $15 | | Slate | $10 – $30 |
  • Longevity and Maintenance:
    Consider the lifespan of each material:
  • Asphalt shingles last around 20–30 years.
  • Metal roofs can last 40–70 years.
  • Slate and clay tiles often exceed 50 years with proper care.
  • Aesthetic Appeal:
    Choose a material that complements your home’s architectural style and enhances curb appeal.

How a Roofing Material Calculator Works

  1. Input Roof Dimensions: Provide the length and width of each roof section to calculate total surface area (in square feet).
  2. Specify Roof Pitch: Enter the pitch or slope value as this impacts surface area measurements and material requirements.
  3. Material Selection: Based on your preferences (e.g., asphalt shingles or metal), input details such as coverage per bundle or panel.
  4. Waste Factor Adjustment: A waste factor—commonly around 10%—is added to account for cuts, overlaps, and errors during installation.
  5. Results Overview: The calculator outputs estimated quantities of materials (e.g., bundles of shingles), ensuring you purchase an adequate amount without overspending.

Pros and Cons of Common Roofing Materials

Material Advantages Disadvantages
Asphalt Shingles Affordable, easy installation Shorter lifespan compared to others
Metal Durable, lightweight Higher upfront cost
Clay Tiles Fire-resistant, great insulation Fragile; requires reinforced framing
Slate Natural appearance, long-lasting Expensive; heavy

Tips for Using a Material Calculator Effectively

  • Double-check measurements for accuracy before inputting data.
  • Include all areas such as dormers or overhangs when calculating roof dimensions.
  • Account for additional features like valleys or skylights that may impact material requirements.
  • Use data from manufacturers regarding coverage rates per unit (shingle bundles/panels).

By carefully considering these factors and leveraging a reliable roofing material calculator, you can ensure your project stays on track both financially and structurally while achieving optimal results tailored to your specific needs.

builder working on rooftop of house on construction site process of building, roofer workers installing grey metal tile on top of roof with wooden frame outdoors on blue sky background roofing stock pictures, royalty-free photos & images

Roofing Material Calculator: Finding the Best Roofer Manchester NH for Your Project

Selecting the proper materials for your roofing project is a crucial decision that impacts not only the durability and functionality of your roof but also its cost-efficiency and aesthetics. A roofing material calculator can simplify this process by helping you estimate quantities, costs, and suitability based on your specific requirements. Here’s a comprehensive guide to choosing the right materials for your roof.

Factors to Consider When Selecting Roofing Materials

  • Climate: Different materials perform better in certain weather conditions. For example:
  • Asphalt shingles are ideal for moderate climates.
  • Metal roofing excels in areas with heavy snow or rain due to its durability.
  • Clay tiles are perfect for hot regions as they reflect heat effectively.
  • Budget: Roofing costs vary significantly depending on the material. While asphalt shingles are budget-friendly, slate or clay tiles are more expensive but offer greater longevity.
  • Roof Pitch: Some materials work better on steep slopes (e.g., slate), while others are more suitable for low-slope or flat roofs (e.g., membrane roofing).
  • Weight Load: Heavier materials like concrete or clay tiles may require additional structural support.
  • Aesthetics: The appearance of your roof should complement your home’s architecture and style.

Common Types of Roofing Materials

Material Lifespan Cost per Square Foot* Key Benefits Common Drawbacks
Asphalt Shingles 20-30 years $1-$4 Affordable, versatile Susceptible to wind damage
Metal 40-70 years $5-$12 Durable, energy-efficient Higher upfront cost
Clay Tiles Over 50 years $7-$15 Heat-resistant, long-lasting Heavy; requires strong support
Slate 75+ years $10-$20 Elegant appearance Expensive; labor-intensive installation
Wood Shingles 25-30 years $6-$9 Natural aesthetic Prone to fire damage unless treated

*Costs may vary based on location, supplier, and labor expenses.

How a Roofing Material Calculator Helps

  1. Roof Area: Enter the total square footage of your roof (calculated using a roofing area calculator).
  2. Material Type: Select the desired material to estimate its cost per square foot.
  3. Waste Factor: Include an extra percentage (usually 5–10%) to account for cutting waste during installation.

Using these inputs, you can determine quantities and costs with precision. This tool prevents over-ordering or underestimating supplies—saving both time and money.

Tips for Selecting Materials

  • Research warranties offered by manufacturers.
  • Consult with professional roofers for insights about local standards or building codes.
  • Prioritize energy-efficient options such as reflective metal panels or cool asphalt shingles if you live in hot climates.

By carefully evaluating all aspects of your project and leveraging tools like a roofing material calculator, you’ll ensure that you choose durable, cost-effective materials tailored to your needs while avoiding unnecessary expenses.

Roof Installation Manchester NH: Understanding Roof Slopes and Their Importance

The pitch of a roof is a critical aspect of its design, impacting not only the aesthetics but also the functionality and durability of the structure. Understanding roof pitch, its measurements, and why it matters is essential for homeowners, contractors, and roofing professionals.

What is Roof Pitch?

Roof pitch refers to the slope or steepness of a roof. It is commonly represented as a ratio between the vertical rise and the horizontal span (run) of the roof. For example, if a roof rises 6 inches for every 12 inches of horizontal run, the pitch would be expressed as “6/12.” This ratio helps determine how steep or flat a roof appears.

Roof pitch can also be expressed in degrees by measuring the angle from the horizontal plane. However, using ratios like “4/12” or “8/12” is more common in roofing calculations and industry standards.

How to Measure Roof Pitch

  • Step 1: Gather Tools
    You’ll need a tape measure, level (preferably at least 12 inches long), pencil, and calculator for this process.
  • Step 2: Identify Start Point
    Place one end of your level against the base of your roof (e.g., near an eave). Ensure it’s perfectly horizontal by checking the bubble indicator on your level.
  • Step 3: Measure Vertical Rise
    From where your level meets the edge of your roof, measure straight up vertically until it touches the underside surface at another point X distance away horizontally from Level origin piece´s extension-plane below-top-edge perspective). Note that measurement as rise height..
    Repeat these tests multiple spots nearest generic-frame-median across-sloped surfaces confirm consistency finalizing true-pitch-calibrations deriving rational-resultant-rationals

Essential Tools and Tips for Accurate Roofing Calculations

Accurate roofing calculations are the foundation of any successful roofing project. Whether you’re a professional contractor or a homeowner tackling a DIY project, having the right tools and techniques ensures efficiency, cost-effectiveness, and precision. This guide will delve into the essential tools you need and provide tips for accurate calculations.

Must-Have Tools for Roofing Calculations

  • Measuring Tape: A durable measuring tape (at least 25–50 feet) is key for measuring roof dimensions.
  • Laser Distance Measure: For large or high-pitched roofs, laser distance measurers provide accuracy without requiring direct access to every roof surface.
  • Roofing Square: Used to calculate angles and check the straightness of edges.
  • Pitch Gauge: Helps determine the slope of your roof accurately, often included in some smartphone apps as well.
  • Calculator or Roofing Software: Digital calculators or roofing-specific software can quickly process measurements into square footage or material requirements.
  • Chalk Line Tool: Assists in marking straight lines on surfaces for cutting or alignment.
  • Drone with Camera (Optional): Ideal for viewing hard-to-access areas without physically stepping on unstable sections.

Pro Tips for Accurate Roofing Measurements

  1. Measure the length and width of each section of the roof at ground level if possible.
  2. Multiply these dimensions to calculate square footage of each section.
  3. Roof pitch significantly affects material needs. Use a pitch gauge to determine vertical rise over horizontal run (e.g., 4/12).
  4. Apply this factor when calculating total area: | Pitch Ratio | Multiplier | |————–|————| | 3/12 | 1.04 | | 6/12 | 1.12 | | 9/12 | 1.25 | | 12/12 | 1.41 |
  5. Shingles or other roofing materials require overlaps to prevent leaks, typically adding around 10–15% extra material beyond the roof’s size.
  6. During cutting or fitting materials around vents, chimneys, and edges, waste is inevitable. Account for an additional buffer of approximately 5–10% when ordering supplies.
  7. For roofs with dormers, hips, valleys, or other architectural features:
    • Divide the roof into smaller sections.
    • Measure each section individually before summing up total square footage.

Utilizing Technology in Roofing Calculations

  • Roofing Software Solutions
    Platforms like RoofSnap or EagleView use aerial imagery to deliver precise roof measurements without manual labor.
  • Mobile Apps for On-Site Assistance
    Many mobile apps include built-in pitch gauges and calculators that streamline processes while reducing human error.
  • Drones as Inspection Tools
    Drones equipped with high-resolution cameras allow you to safely inspect difficult-to-reach areas while collecting data essential for accurate calculations.

Final Words on Accuracy

Investing time in careful planning pays dividends during installation by reducing costs associated with overordering materials or redoing work due to miscalculations. Using proper tools combined with smart techniques ensures results that meet both safety standards and aesthetic expectations while minimizing unnecessary expenses for your project.


The Ultimate Guide to Manchester NH Roofing Installation and Replacement

Man installing asphalt roof Installing new roof with  nail gun and shingles roofing stock pictures, royalty-free photos & images

A professional roof installation or replacement is a significant investment in the safety, beauty, and longevity of your home. Whether you’re dealing with storm damage, upgrading an aging roof, or building from scratch, understanding the process helps ensure the project is executed efficiently and effectively. Below, we’ll explore key aspects that go into roof installation and replacement.

Importance of Professional Installation

Roofing is not just about placing shingles on your house – it’s a complex process requiring skill and expertise.
Proper Installation: Preventing leaks, water damage, and structural issues by following industry standards.
Warranty Compliance: Many roofing material manufacturers require certified professionals for warranty eligibility.
Safety: Roofing involves risks like working at heights and handling heavy materials; trained professionals mitigate these dangers.

Investing in professional services means peace of mind knowing that your roof will be durable and secure for years.

Steps Involved in Roof Replacement

  1. Professionals begin by examining your existing roof to identify damage, weak areas, or structural concerns.
  2. They’ll check for rot, mold, or sagging that might compromise the new installation.
  3. The old roofing materials are carefully removed down to the decking.
  4. Debris is properly disposed of to leave a clean slate for installation.
  5. If the decking has deteriorated due to moisture or age, it will need repair or replacement before proceeding.
  6. A waterproof layer (underlayment) is installed over the deck to provide additional protection against leaks.
  7. Depending on your chosen material (e. g. , asphalt shingles, metal panels), skilled crews carefully lay them out following precise patterns for durability and aesthetics.
  8. Flashing is installed around chimneys, skylights, valleys, and other vulnerable areas to prevent water intrusion.
  9. Proper ventilation systems are added to regulate attic temperature and prevent moisture buildup.
  10. Thorough checks are conducted to ensure everything meets building codes and quality standards.

Key Considerations When Replacing a Roof

  • Material Choice:Select materials suited for your climate and aesthetic preferences (e. g. , asphalt shingles for affordability or metal roofs for durability).
Material Lifespan Cost per Square Foot (Approx.)
Asphalt Shingles 20-30 years $3-$5
Metal Roofing 40-70 years $7-$12
Tile Roofing 50+ years $8-$15
  • Budget:Allocate funds not only for materials but also labor costs; ask contractors about financing options if necessary.
  • Timing:Plan ahead as roofing projects can be weather-dependent; avoid scheduling during seasons prone to rain or snow.
  • Permits:Ensure all required permits are obtained before work begins – reputable contractors often handle this aspect on your behalf.

Advantages of Professional Roof Replacement

  1. Increased lifespan of your new roofing system due to expert workmanship.
  2. Enhanced curb appeal adds value if you plan on selling your home.
  3. Improved energy efficiency thanks to modern materials designed with insulation benefits in mind.
  4. Reduced maintenance costs compared to poorly installed DIY jobs that could lead to recurring issues like leaks or drafts.

Hiring professionals ensures quality results while protecting one of your home’s critical components – its roof – from future problems caused by improper installation practices or overlooked details during replacement efforts.

Essential Tools and Materials Needed for a Roofing Contractor Manchester NH

When it comes to any roofing project, having the right tools and materials is essential for ensuring safety, efficiency, and a high-quality result. Whether you’re a professional roofer or a homeowner preparing for a project, assembling the appropriate tools and selecting quality materials can save time while ensuring durability. Below is an overview of the essential items you’ll need.

Tools for Roofing Projects

A successful roofing project requires specialized tools designed to handle tasks like removing old roofing materials, installing shingles, cutting metal flashing, and sealing edges.

  • Roofing Hammer or Hatchet: Combines the functions of a hammer with those of a nail-pulling tool.
  • Utility Knife: Ideal for cutting shingles to size.
  • Chalk Line Tool: Helps achieve straight lines when laying out rows of shingles.
  • Roofing Nailer: Speeds up shingle installation by driving nails efficiently.
  • Extension Ladder: Ensures access to elevated areas safely.
  • Shingle Remover/Flat Pry Bar: Used to strip away old shingles and nails during roof replacement projects.
  • Tin Snips/Metal Shears: Perfect for cutting metal flashing or gutters.
  • Measuring Tape: Ensures precise cuts and spacing during installation.
  • Caulk Gun: Applies roofing sealant cleanly on joints or seams.

Additional safety tools include harnesses, non-slip shoes, hard hats, gloves, and protective eyewear.

Key Materials Required

The materials you choose will directly impact your roof’s longevity and performance.

  1. Options include asphalt (architectural or three-tab), wood shakes, slate tiles, or metal panels.
  2. A waterproof barrier placed beneath shingles to prevent water infiltration. Common options include felt paper (tar paper) or synthetic underlayment.
  3. Metal strips placed around vents, chimneys, valleys, and edges to prevent water penetration.
  4. Enhances attic ventilation by allowing hot air to escape while preventing moisture buildup.
  5. Metal edging that protects roof edges from water damage by directing rain into gutters.
  6. Galvanized nails are commonly used since they resist rusting over time.
  7. Roofing caulk or adhesives help seal gaps on flashing and other vulnerable areas.
  8. A self-adhering membrane designed to protect against ice dams in cold climates.

Bonus Tip: Preparing for Weather Conditions

Before starting any roofing project: – Check weather forecasts to avoid working in rain or high winds. – Cover exposed areas with tarps if unexpected changes occur during your project timeline.

Tool/Material Purpose
Roofing Nailer Efficiently installs shingles
Underlayment Waterproof layer beneath roof surface
Flashing Prevents leaks at vulnerable points
Ridge Vent Improves attic ventilation

By gathering these critical tools and materials before beginning your work on the roof, you’ll be better prepared to execute your project safely while achieving lasting results.

Essential Tools and Materials Every Roofer Manchester NH Should Have

Having the right tools and materials is crucial for any roofing project, whether you’re a seasoned professional or a DIY enthusiast. Proper preparation not only makes the job easier but also ensures safety, efficiency, and durability. Below is a detailed guide on the essential tools and materials needed for roofing projects.

Tools Required for Roofing Projects

A well-equipped toolkit is indispensable for tackling roofing tasks effectively.

  • Roofing Hammer: A specialized tool with a claw for removing nails and a magnetized head to hold nails in place during installation.
  • Utility Knife: Necessary for cutting roofing felt, shingles, or other materials cleanly and accurately.
  • Roofing Nail Gun: Speeds up the process of securing shingles compared to manual hammering.
  • Chalk Line Tool: Used to mark straight lines on your roof, ensuring proper alignment of shingles.
  • Pry Bar or Crowbar: Helps remove old shingles, nails, or other debris from your roof surface.
  • Measuring Tape: Ensures accurate measurements of your roof area and materials.
  • Ladder with Stabilizer: Provides secure access to your roof while minimizing risks.
  • Safety Harness and Anchor System: Critical for preventing serious injuries when working at heights.

Additional Tools for Efficiency

  • Circular saw (for trimming wood)
  • Tin snips (for cutting sheet metal like flashing)
  • Magnetic sweeper (to collect stray nails)
Tool Primary Use
Roofing Hammer Driving/removing nails
Utility Knife Cutting materials
Chalk Line Tool Drawing straight alignment lines
Pry Bar Removing old shingles

Materials Needed for Roofing Projects

Choosing high-quality materials ensures that your new roof will last.

  1. Options include asphalt shingles (three-tab or architectural), wood shakes, slate tiles, or metal panels. Asphalt is the most popular choice due to its affordability and durability.
  2. This layer provides waterproof protection beneath the shingles. Common options include felt paper and synthetic underlayment.
  3. Typically made of plywood or oriented strand board (OSB), this forms the base layer onto which all other components are installed.
  4. Essential for areas prone to leaks such as chimneys, skylights, vents, or valleys.
  5. Help improve attic ventilation by allowing heat and moisture to escape.
  6. Ensure that you have corrosion-resistant nails suited to weather conditions in your region.
  7. Used to secure flashing or patch minor leaks during installation.

Preparing Your Materials Checklist

Sample Checklist:
  • [ ] Shingles
  • [ ] Underlayment
  • [ ] Flashing
  • [ ] Safety equipment (harnesses, anchors)
  • [ ] Proper tools (nail gun, utility knife)

Proper planning begins with gathering these essentials beforehand so you can avoid unnecessary delays during installation.

Using quality tools and durable materials not only enhances efficiency but also improves long-term results in any roofing project. By investing in proper preparation upfront—both in equipment and resources—you set yourself up for success when installing or replacing a roof system professionally.

Step-by-Step Guide to Roof Installation Manchester NH: Shingling Like a Pro

Shingling a roof is a critical part of ensuring your home stays protected from the elements. Following a systematic approach can help you achieve professional results and extend the lifespan of your roof. Below is a detailed step-by-step guide to shingling your roof effectively.

Preparation Before You Begin

Before starting the shingling process, ensure you are well-prepared with the necessary tools, materials, and safety measures. Proper preparation will save time and minimize potential issues during installation.

  • Roofing nail gun or hammer
  • Utility knife
  • Roofing shovel or pry bar (for tear-offs)
  • Chalk line
  • Ladder/roof harness for safety
  • Measuring tape
  • Asphalt shingles (architectural or three-tab)
  • Roofing felt or underlayment
  • Drip edge
  • Roofing nails
  • Starter strip shingles
  • Non-slip footwear
  • Helmet
  • Safety goggles
  • Harness with anchor points

Step-by-Step Shingling Process

Use this methodical guide to ensure proper installation of shingles.

  1. Inspect the Roof Deck
    – Remove old shingles and any debris if you’re replacing an existing roof. – Ensure that the decking is solid and free of rot or damage. – Replace damaged sections before proceeding.
  2. Install Drip Edge
    – Run drip edge flashing along the eaves, securing it with roofing nails about every foot. – This prevents water from seeping under your underlayment and into your decking.
  3. Lay Down Underlayment
    – Roll out your chosen roofing underlayment (felt paper or synthetic material) across the deck. – Overlap sections by about six inches to ensure coverage. – Secure it with staples or nails as recommended by the manufacturer.
Type of Underlayment Benefits
Felt Paper Affordable, good basic coverage
Synthetic Durable, tear-resistant
  1. Install Starter Strip Shingles
    – Secure starter strip shingles along the edge of the roof to create a solid foundation for subsequent rows. – Align them carefully to prevent misaligned rows higher up on the roof.
  2. Lay Down the First Row of Shingles
    – Begin at one bottom corner using full-sized shingles. – Nail each shingle in place using four nails per strip (or six if specified for high-wind areas). – Follow manufacturer guidelines for nail placement to avoid damaging shingles.
  3. Work Your Way Upward in Rows
    – Stagger each new row so seams do not align directly above those in previous rows. – Use a chalk line frequently to maintain straight rows throughout installation.

Pro Tips for Professional Results

  1. Avoid Overdriving Nails:Ensure nails are flush with but not cutting into shingles to maintain their integrity.
  2. Check Weather Conditions:Avoid working on days with expected rain or high winds as these can hinder progress and compromise safety.
  3. Seal Ridge Cap Shingles Carefully:The ridge cap is often exposed to intense weather; make sure it’s securely fastened and properly overlapped.

By following these steps carefully, you can achieve a well-shingled roof that offers long-lasting durability while boosting your home’s curb appeal. Proper planning and adherence to best practices are key components in achieving success when tackling this project like a professional roofer would.

Snow guard for safety in winter on house roof top covered with ceramic shingles. Tiled covering of building Snow guard for safety in winter on house roof top covered with ceramic shingles. Tiled covering of building. roofing stock pictures, royalty-free photos & images

Essential Tips for Roof Replacements Manchester NH: Flashing and Ridge Vent Installation

Proper installation of flashing and ridge vents is essential for maintaining the durability and performance of your roof. These components play a critical role in protecting your home against water infiltration and ensuring adequate attic ventilation. Below, we provide a detailed guide to help you install flashing and ridge vents like a professional.

Why Flashing and Ridge Vents Are Important

  • Flashing:Protects vulnerable areas of your roof, such as chimneys, skylights, valleys, and vents, from water penetration.
  • Ridge Vents:Allow hot air and moisture to escape from your attic, preventing issues like mold growth and reducing energy costs.

Tools and Materials Needed

Tools: – Hammer – Utility knife – Pry bar – Roofing nails – Caulking gun – Measuring tape – Chalk line – Drill with screwdriver bits

Materials: – Aluminum or galvanized flashing – Ridge vent (compatible with your roofing materials) – Roofing cement or sealant – Roofing shingles (if repairs are necessary)

Step-by-Step Guide to Installing Flashing

  1. Inspect the area where flashing will be installed (e. g. , valleys, chimneys).
  2. Remove any old or damaged flashing materials.
  3. Use metal shears to cut the flashing to fit snugly around features like chimneys or along valleys.
  4. Ensure you leave enough overlap at seams for effective water resistance.
  5. Align the flashing tightly against the surface it needs to protect.
  6. Use a chalk line or measuring tape to ensure accurate placement.
  7. Nail down one side of the flashing using roofing nails.
  8. Apply roofing cement along edges for added waterproofing.
  9. Overlap subsequent pieces by 4–6 inches to create a continuous barrier.
  10. Check for gaps where water could seep through.
  11. Smooth out sealant with a caulking gun for a clean finish.

Step-by-Step Guide to Installing Ridge Vent

  1. Measure along the peak of your roof where you intend to install the ridge vent.
  2. Use chalk lines as guides for cutting an opening if one doesn’t already exist.
  3. Remove shingles in this area carefully using a pry bar.
  4. Cut a slot on both sides of the ridge board (about 1 inch wide per side).
  5. Center the ridge vent over the opening while ensuring it aligns properly with roofing edges.
  6. Use nails or screws to fasten the vent securely into place along its length.
  7. Cover nails with roofing sealant to prevent leaks.
  8. Reinstall Shingles (If Required):Reattach overlapping shingles around edges of vent openings if they were removed during preparation steps.

Tips for Successful Installation

1) Always work during dry weather conditions when undertaking installations involving adhesives/sealants helpful weatherproof application.
(2) Avoid rushing steps ensuring no misalignments/errors compromise durability.
Double-check measurements prior cutting clearances.

Safety Tips and Best Practices for Roofing Projects

Roofing is a critical component of home maintenance, but it comes with its own set of challenges and risks. Ensuring safety during roofing projects should always be the top priority, whether it’s a simple repair or a complete roof replacement. Below are essential safety tips and best practices to follow to minimize risks and ensure a smooth roofing process.

Wear Proper Personal Protective Equipment (PPE)

Using appropriate personal protective equipment is crucial for preventing injuries when working on a roof.

  • Non-slip shoes or boots:These provide better grip, especially when walking on steep or wet surfaces.
  • Hard hats:Protect your head from falling debris or accidental bumps.
  • Safety harnesses:Essential when working at heights, particularly on sloped roofs.
  • Gloves:Reduce the risk of cuts and abrasions when handling materials like shingles or flashing.
  • Eye protection:Shields your eyes from dust, flying nails, or other debris.

Plan for Weather Conditions

Weather plays a significant role in roofing safety.

  • Avoid working during strong winds, rain, snow, or icy conditions as these greatly increase the risk of slips and falls.
  • Check weather forecasts in advance to ensure you have clear skies for your project.
  • Be cautious in hot weather; prolonged sun exposure can lead to dehydration and heat exhaustion.
Weather Condition Risk Safety Tip
Rain Slippery surfaces Wait for dry conditions
High winds Falling objects Secure tools & materials properly
Extreme heat Heat exhaustion Stay hydrated; take regular breaks

Use Proper Equipment

Having the right tools and equipment in good condition makes your work safer and more efficient.

  • Use sturdy ladders with locking mechanisms to prevent accidental movement.
  • Ensure scaffoldings are stable if they are being used instead of ladders.
  • Always inspect power tools (e. g. , nail guns) before using them to ensure they function properly.

Maintain Good Roof Practices

Safe habits on the roof can prevent accidents.

  1. Keep your workspace clean by removing loose materials that could cause you to trip.
  2. Avoid overloading any area with too many materials at once—this could compromise structural integrity.
  3. Never work near edges without proper fall protection systems like guardrails or tie-offs.

Work with a Team When Possible

Roofing projects can often be safer when conducted as part of a team rather than attempting them alone.

  • Help hold ladders steady during climbs or descents.
  • Pass tools safely instead of requiring you to balance while moving them yourself.
  • Monitor your safety while you focus on completing tasks.

Know Emergency Procedures

Understanding what steps to take in case of an emergency is just as important as preventing accidents.

  1. A first aid kit readily available nearby.
  2. Contact information for local emergency services saved on your phone or written down somewhere accessible.
  3. A clear plan for safely exiting the roof in case sudden situations arise (e. g. , weather changes).

By following these safety tips and best practices, roofing projects can be completed efficiently while minimizing risks for everyone involved.

How to Choose Between Architectural and Three-Tab Shingles for Your Roof

When it comes to roofing, selecting the right type of shingles is a significant decision that affects not only the aesthetics of your home but also its durability and value. Two of the most common shingle options are architectural shingles and three-tab shingles. Understanding their differences can help you make an informed choice based on your home’s needs, budget, and style preferences.

Key Features of Architectural Shingles:
Durability: Due to their multiple layers, architectural shingles tend to have longer lifespans (typically 25–30+ years) compared to three-tab shingles.
Aesthetic Appeal: Their textured design adds depth and dimension to your roof, boosting curb appeal.
Wind Resistance: They often have higher wind resistance ratings (up to 110–130 mph).
Cost: Architectural shingles usually cost more than three-tab options due to their premium materials and performance benefits.


What Are Three-Tab Shingles?

Three-tab shingles are a traditional roofing option known for their simple design and affordability. These shingles have a uniform appearance with cutouts (or “tabs”) along the bottom edge that give them their name.

Key Features of Three-Tab Shingles:
Affordability:Three-tab shingles are generally less expensive upfront compared to architectural options.
Lifespan:These shingles typically last around 15–20 years under ideal conditions.
Lightweight Design:They’re thinner than architectural shingles, which can make them easier for contractors to handle during installation but less durable over time.
Uniform Appearance:The consistent shape provides a clean, flat look once installed.

Comparing Architectural vs.

Feature Architectural Shingles Three-Tab Shingles
Cost Higher initial cost Budget-friendly
Lifespan 25–30+ years 15–20 years
Appearance Textured and dimensional Flat and uniform
Wind Resistance Up to 110–130 mph Generally up to 60 mph
Weight Heavier Lightweight

Factors to Consider When Choosing

  1. Budget Constraints: If you’re working with limited funds, three-tab shingles may be the better choice due to their lower upfront cost.
  2. Durability Needs: For areas prone to high winds or harsh weather conditions, the extra durability of architectural shingles may be worth the investment.
  3. Aesthetic Preferences: If enhancing your home’s curb appeal is important, architectural shingles offer more visual interest with their dimensional designs.
  4. Roofing Structure: If your roof has structural limitations in terms of weight-bearing capacity, lighter three-tab shingles could be more suitable.
  5. Longevity Goals: For long-term value or reduced maintenance needs over time, consider investing in durable architectural materials.

Final Thoughts

Both architectural and three-tab shingles have unique strengths that cater to different roofing needs. By carefully considering factors such as longevity requirements, budget limitations, climate challenges, and aesthetic preferences, you’ll be well-equipped to choose the best option for your home’s roof installation or replacement project.


Tips for Choosing the Right Roofing Contractor Manchester NH for Your New Roof Installation

Roof Shingle Inspection Roofing Shingle Inspection roofing stock pictures, royalty-free photos & images

A new roof is a significant investment that enhances the safety, functionality, and aesthetic appeal of your home. Whether you’re replacing an old roof or building one for a new structure, understanding the essentials of roof installation can help ensure the process is smooth and successful. Below are key considerations and tips to guide homeowners through this important project.

Choosing the Right Roofing Material

The type of roofing material you select has a considerable impact on durability, energy efficiency, and overall appearance.
Asphalt Shingles: Affordable and widely available with various color options.
Metal Roofing: Durable, low-maintenance, and energy-efficient.
Clay or Concrete Tiles: Stylish and long-lasting but heavier than other options.
Slate: Natural, elegant, but more expensive and requires additional structural support due to its weight.

Consider factors such as climate conditions in your area, maintenance requirements, budget constraints, and architectural style before making a decision.

Hiring a Qualified Roofing Contractor

Professional installation is critical to ensure your new roof performs efficiently over its lifespan.
1. Verify licenses and insurance coverage to protect both parties during the project.
2. Request references or reviews from previous clients to assess reliability and quality of work.
3. Obtain detailed estimates in writing that outline costs for labor, materials, permits, and cleanup.

Preparing Your Home for Roof Installation

Before installation begins:
– Clear the attic space as debris may fall during construction. Cover valuable items with protective sheeting if moving them isn’t feasible. – Remove outdoor furniture or decorations near the house to prevent accidental damage. – Notify neighbors about potential noise or disruptions during construction.

Proper preparation minimizes stress during the process.

Importance of Proper Ventilation System Design

Ventilation plays an essential role in extending your roof’s lifespan by regulating temperature and moisture levels in your attic space: – Adequate ventilation prevents heat buildup that can deteriorate shingles prematurely.

Essential Reasons to Hire a Roofer Manchester NH for Quality Roof Installation

Roof installation is a critical aspect of home construction and maintenance. A properly installed roof provides structural integrity, protects the home from environmental damage, and enhances energy efficiency. While some homeowners may be tempted to cut costs with DIY solutions or hiring inexperienced contractors, professional expertise is crucial for ensuring a quality roof installation. Below, we delve into why professional involvement is indispensable.

Professional roofers possess in-depth knowledge about various roofing materials and systems. They can guide homeowners to select the best options tailored to their specific needs, climate conditions, and budget.

  • Asphalt Shingles: Affordable, durable, and widely used for residential homes.
  • Metal Roofing: Long-lasting and energy-efficient but requires specialized knowledge for proper installation.
  • Clay or Concrete Tiles: Ideal for hot climates but heavier and requiring substantial structural support.
  • Slate Roofing: Extremely durable but expensive and labor-intensive to install.

Professionals understand the pros and cons of each material type, helping you make informed decisions that align with your goals.

Proper roof installation involves meticulous attention to detail in areas such as underlayment placement, flashing installation, shingle alignment, gutter integration, and sealing techniques.

  • Water leaks or improper drainage
  • Reduced lifespan of the roofing material
  • Increased vulnerability to wind damage

Licensed contractors are trained to follow industry best practices while adhering to local building codes.

Roof installations often require permits depending on local regulations. Professionals handle the permitting process on their client’s behalf, ensuring compliance with all applicable laws. This helps homeowners avoid potential fines or rework due to non-compliance.

Aspect DIY Attempt Professional Installation
Permit Handling Homeowner-managed Contractor-managed
Compliance With Building Codes Risk of oversight Guaranteed compliance

Roofing projects require specialized tools like nail guns, safety harnesses, ladders/scaffolding systems designed for steep angles, cutting tools for precise trimming of shingles/tiles, etc. Without these resources—and without knowing how to use them correctly—homeowners risk subpar results or even injury.

Hiring professionals ensures that proper tools are utilized efficiently throughout the project.

Many professional roofing companies provide warranties on both materials used as well as workmanship quality offered during installations—a safeguard against unforeseen issues arising later down post-work completion timeline!

  • Lifetime warranty coverage over premium-grade shingle lines
  • Five-year service repair guarantees

Such assurances significantly minimize future repair/replacement costs ensuring peace-of-mind post-investment

In conclusion Professional Roof Installations represent long-term solid-value aligning durability aesthetics-compliance

Essential Tips for Roof Installation Manchester NH Homeowners Should Know

Whether you’re looking to enhance your property’s value, improve energy efficiency, or replace a damaged roof, there are critical factors to evaluate before proceeding. Making informed decisions not only ensures the success of the project but also helps you avoid unnecessary expenses in the long run. Below are the key considerations every homeowner should keep in mind.

The choice of material has a significant impact on the longevity, appearance, and cost of your roof.

  • Asphalt Shingles: Affordable, widely available, and easy to install. Lifespan ranges from 15-30 years.
  • Metal Roofing: Durable and energy-efficient with an expected lifespan of 40-70 years. It can be costlier upfront.
  • Clay or Concrete Tiles: Known for their durability and aesthetic appeal but require strong structural support due to their weight. Lifespan exceeds 50 years.
  • Slate Roofing: A premium option that provides unmatched longevity (75+ years), but comes at a higher price point.

It’s important to select materials suited to your climate and architectural style while considering both short-term costs and long-term benefits.

Understanding the total cost of installation is essential for avoiding financial surprises during the project.

  • Material costs
  • Labor charges
  • Removal of the old roof (if applicable)
  • Additional repairs (e. g.
  • Permits or inspection fees

For larger projects, it may be prudent to request multiple quotes from licensed contractors before making your decision.

Climate Condition Recommended Materials Additional Features
Hot/Arid Regions Metal roofing, clay tiles Reflective coatings for heat resistance
Wet/Humid Areas Asphalt shingles with mold resistance Proper drainage systems
Snowy/Cold Climates Slate roofing, metal with snow guards Insulation layers for heat retention
High Wind Zones Impact-resistant asphalt shingles Reinforced fasteners

Choosing weather-compatible materials supports durability while reducing maintenance needs over time.

Hiring an experienced roofer is crucial for ensuring high-quality installation.

  • Verify licenses, certifications, and insurance coverage.
  • Request references from past clients.
  • Confirm they offer warranties on both labor and materials.

A reputable contractor will also provide detailed estimates and timelines before starting work.

  • Slope/Pitch: Steeper roofs shed water more effectively but may increase labor costs during installation.
  • Ventilation: Ensuring proper airflow reduces moisture buildup in your attic space and extends the lifespan of roofing components.

Proper ventilation systems include ridge vents, soffit vents, or attic fans depending on your home’s structure.

Check local building codes early in the planning process to ensure compliance.

By taking these factors into account ahead of time, you can achieve a successful roofing project that meets both functional requirements and aesthetic preferences while staying within budget constraints.

Steps for Seamless Roof Replacements Manchester NH Homeowners Need to Know

A new roof installation is a significant home improvement project that requires careful planning and execution. Understanding each step in the process can help homeowners better prepare, ensure quality outcomes, and avoid unnecessary stress. Below is a detailed breakdown of the key steps involved in a seamless new roof installation.

The roofing process begins with a thorough inspection of the existing roof (if present) or the structure where the new roof will be installed. A professional roofer will: – Assess the condition of shingles, flashing, gutters, and vents (if applicable). – Identify signs of damage such as rot, leaks, or structural issues. – Determine whether repairs or reinforcements are necessary before installation.

Choosing the right materials is essential for durability and aesthetics. Homeowners should work closely with their contractor to select materials that suit their climate, budget, and style preferences.Asphalt Shingles: Affordable and versatile.Metal Roofing: Durable and energy-efficient.Clay or Concrete Tiles: Long-lasting but heavier.Slate Roofing: Premium appearance with high durability.

Factors to consider during material selection: | Factor | Importance | |————————-|———————————————–| | Climate suitability | Resistance to wind, rain, snow, or heat | | Longevity | Lifespan of material | | Maintenance requirements| Ease of upkeep | | Cost | Budget-friendly options |

Preparation involves several critical steps to ensure smooth execution: – Protecting landscaping around your home from debris using tarps or plywood sheets. – Removing old roofing materials (if applicable). – Inspecting decking underneath the removed roof for potential issues like rot or water damage.

Before installing roofing materials, an underlayment must be applied over the decking to provide waterproofing protection. Flashing is then installed around vulnerable areas such as chimneys, skylights, valleys, and vents to prevent water infiltration.

Key benefits of this step include: – Enhanced moisture resistance. – Improved insulation performance.

This step involves securely attaching your chosen roofing material based on manufacturer guidelines. Proper alignment and spacing are critical during this phase to maintain both function and appearance.

Proper ventilation ensures airflow through your attic space while preventing condensation buildup that could damage your roof over time.

Types of ventilation systems include: – Ridge vents – Soffit vents – Gable-end vents

A well-installed ventilation system prolongs your roof’s lifespan by reducing excess heat and moisture buildup.

Once installation is complete: 1. The contractor will perform a final inspection to verify proper alignment, sealing, flashing placement, etc. 2. Any waste material from construction (e. g. , nails/shingles) will be removed from your property. 3. A warranty might be issued for both labor and materials used during installation.

Adhering carefully to these steps helps ensure long-term performance while avoiding costly repairs down the road. Working with an experienced contractor familiar with best practices is crucial for achieving reliable results without complications.

How Long Does the Process of New Roof Installation Typically Take?

Understanding these variables is crucial for setting realistic expectations and minimizing disruptions during the project.

Factors Influencing Roof Installation Time

  • Size of the Roof:
    Larger roofs naturally require more time to install than smaller ones. A small residential roof may be completed in one to two days, while larger or more complex projects could take up to a week or more.
  • Type of Roofing Material:
    The material you choose plays a significant role in determining installation time:
    | Roofing Material | Estimated Installation Time |
    |————————–|———————————-|
    | Asphalt Shingles | 1-3 Days |
    | Metal Roofing | 2-5 Days |
    | Slate Tiles | Up to a Week or More |
    | Wood Shakes | Approximately 3-5 Days |
  • Roof Complexity:
  • Weather Conditions:
    Adverse weather conditions such as rain, wind, or extreme heat can delay installation. Most professional roofing contractors will monitor the weather forecast closely to avoid interruptions and safety concerns.

Typical Timeline for New Roof Installation

  1. Removal of old roofing materials
  2. Inspection for damage in decking or underlying structures
  3. Repairs or replacement if necessary
  4. Installation of underlayment and waterproof barriers
  5. Placement of shingles, tiles, metal panels, or other chosen materials
  6. Securing flashing around chimneys and vents
  7. Cleanup and debris removal
  8. Final inspection by both contractor and homeowner

Tips for Keeping Your Project on Schedule

Homeowners play an important role in ensuring smooth project management.

  • Ensure all necessary permits are obtained before starting work.
  • Choose readily available roofing materials rather than custom orders that may have long lead times.
  • Work with a reliable contractor who has experience managing timelines effectively.
  • Clear your driveway or access points prior to construction so workers can transport materials efficiently.

By understanding these factors and working closely with your roofing contractor from start to finish, you’ll have better clarity on how long your installation will take while avoiding unnecessary surprises.

Installing Shingles over Ridge Vent A roofer nails shingles over ridge vent material used on the peak of new residential house construction. roofing stock pictures, royalty-free photos & images

Mistakes Homeowners in Manchester NH Roofing Projects Should Avoid During Installation

A roof installation is a significant investment that requires careful planning and execution. Below are key mistakes to watch out for and how to mitigate them.

Skipping Professional Installation

While DIY projects can save money upfront, roofing is a complex task requiring specialized skills and tools. Hiring experienced roofing contractors ensures your roof is installed correctly and meets local building codes.

Why Professional Help Matters:– Proper installation techniques prevent leaks. – Professionals understand weather-proofing methods. – They ensure compliance with permits and regulations.

Choosing Low-Quality Materials

Opting for cheaper materials might seem like a way to save money, but it can compromise the lifespan and durability of your new roof. High-quality materials may have higher upfront costs but offer better long-term protection against weather damage and wear.

Key Material Considerations: | Material Type | Average Lifespan | Benefits | |——————–|——————-|—————————| | Asphalt Shingles | 20-30 years | Affordable, easy to install | | Metal Roofing | 40-70 years | Durable, energy-efficient | | Clay Tiles | 50+ years | Long-lasting, aesthetic charm |

Ignoring Ventilation Needs

Proper ventilation is crucial in maintaining the health of your roof structure. Without adequate airflow, heat and moisture can build up in your attic, leading to mold growth or structural damage over time.

Signs of Poor Ventilation:– Excessive attic heat during summer. – Visible mold or mildew in attic spaces. – Uneven temperature distribution throughout your home.

To ensure proper ventilation: – Install ridge vents along the peak of your roof. – Include soffit vents for airflow at the eaves. – Use professional guidance to assess ventilation needs specific to your home design.

Failing to Secure Permits

Roof installations often require permits from local authorities. Neglecting this step may result in fines or issues when selling your property later on. Always check with your roofing contractor regarding necessary permits before work begins.

Steps for Securing Permits:1. Contact local building authorities to confirm requirements. 2. Ensure all paperwork is submitted before starting the project. 3. Verify that inspections are completed after installation.

Overlooking Routine Maintenance Post-Installation

Once the roofing process is complete, some homeowners neglect ongoing maintenance. Regular inspections help identify minor issues—like loose shingles or damaged flashing—before they worsen into major problems.

Maintenance Tips:– Schedule annual professional inspections. – Remove debris like leaves from gutters and downspouts regularly. – Address missing shingles or leaks immediately upon discovery.

Avoiding these common mistakes not only protects your investment but also extends the life of your roof while enhancing its performance over time. Proactive decision-making at every stage will ensure you get maximum value out of your new roofing system while minimizing unexpected complications later on.

Permits and Regulations You Need to Understand Before Installing a New Roof

However, before starting, it’s critical to understand the local permits and regulations that govern roofing projects. Navigating these requirements ensures your installation meets legal standards, avoids penalties, and protects your home in the long term.

Why Permits Are Necessary

Permits are essential for ensuring safety and compliance with building codes. Local governments enforce these codes to maintain structural integrity, energy efficiency, and fire safety. By obtaining the necessary permits, you help safeguard your investment and ensure that contractors follow professional standards.

Some reasons why roofing permits are required include: – Verification that materials meet local building codes – Ensuring the roof can withstand local weather conditions – Preventing improper installations that could lead to safety hazards

Common Types of Permits for Roof Installation

The specific permits required vary by location, but here are some common types: 1.Building Permits: Required for major structural changes or complete roof replacements. 2.Zoning Permits: Needed if the project alters the property’s appearance or footprint significantly. 3.Environmental Permits: Applicable if roofing involves hazardous material disposal (e. g. , asbestos). 4.Historical Property Permits: Required when working on homes designated as historical landmarks.

Always consult your local building authority to determine which permits apply to your project.

Steps for Obtaining Roofing Permits

Follow these steps to ensure compliance with local regulations: 1.Research Local Requirements
Begin by contacting your city or county’s building department. They will provide guidelines on what permits are needed and how to apply.

  1. Hire a Licensed Contractor
    Many professional roofers handle permitting on behalf of homeowners, streamlining the process while ensuring compliance.
  2. Submit Necessary Documentation
    Prepare detailed plans of the proposed work, including materials used, structural changes, and waste disposal methods if applicable.
  3. Pay Permit Fees
    Fees vary depending on location and scope of work but are typically based on project size or value.
  4. Schedule Inspections
    Many jurisdictions require inspections during different phases of installation (e. g. , removing old shingles or adding new layers).
Permit Type Typical Cost Range Timeframe for Approval
Building Permit $150–$500 1–2 weeks
Environmental Permit Varies 2–4 weeks
Historical Property Permit $100–$300 3–6 weeks

Key Regulations Homeowners Should Be Aware Of

Material Restrictions: Certain areas have rules about roofing materials based on fire resistance or sustainability factors.Energy Efficiency Standards: Some states mandate roofs meet specific energy-efficient standards (e. g. , cool roofs in California).Structural Load Limits: Your roof must be able to support additional weight from new materials without compromising safety.

Tips for Staying Compliant During Roof Installation

To avoid potential delays or fines: – Double-check permit expiration dates; some may require renewal if delayed. – Regularly communicate with contractors to ensure they follow approved plans. – Keep copies of all documentation related to permits in case of inspections.

By understanding and adhering to these guidelines regarding permits and regulations, you’ll help ensure a smooth roofing process while safeguarding your home’s value and structural integrity over time.

Tips for Ensuring Proper Ventilation for Your Newly Installed Roof

Proper ventilation is a critical yet often overlooked aspect of roof installation. A well-ventilated roof not only improves the comfort and energy efficiency of your home but also prolongs the lifespan of your roofing materials. Below, we explore key tips to ensure adequate ventilation for your newly installed roof.

Why Roof Ventilation Matters

  • Moisture Control: Adequate ventilation helps to prevent condensation, which can lead to mold growth or wood rot over time.
  • Extending Roof Lifespan: Overheated or moisture-laden attics can cause roofing materials to deteriorate prematurely.

There are several types of ventilation systems you might consider for your new roof.

Type Description
Ridge Vents Installed along the peak of the roof, allowing warm air to escape naturally.
Soffit Vents Placed underneath eaves to enable entry of cool air into the attic space.
Gable Vents Used on gable ends to promote cross-ventilation between opposite openings.
Turbine Vents Wind-driven vents that actively extract hot air from the attic.
Powered Attic Fans Electric or solar-powered fans designed for enhanced airflow in large spaces.

Tips for Ensuring Proper Ventilation

  1. Conduct a Professional AssessmentHave a roofing professional evaluate the existing ventilation system before installation begins. They can recommend improvements tailored to your home’s layout and regional climate.
  2. Balance Intake and ExhaustFor optimal performance, maintain a 50/50 balance between intake vents (soffit vents) and exhaust vents (ridge or gable vents). This ensures constant airflow throughout the attic space.
  3. Choose High-Quality MaterialsInvest in durable venting materials that are resistant to weathering, such as rustproof metal or UV-protected plastic.
  4. Avoid Over-VentilatingWhile proper airflow is essential, overloading your roof with unnecessary vents can disrupt air balance and potentially compromise energy efficiency.
  5. Inspect Your InsulationEnsure that insulation does not block airflow through soffit or ridge vents during installation. Use baffles if necessary to create unobstructed channels for air movement.
  6. Adhere to Local Building CodesAlways confirm that your venting system complies with local regulations regarding minimum requirements for attic airflow per square footage.
  7. Regular MaintenanceAfter installation, periodically inspect vents for blockages caused by debris, nests, or snow accumulation.

Signs of Poor Ventilation

  • Excessive heat buildup in upper floors during summer
  • Persistent musty odors indicating mold growth
  • Increased energy bills due to HVAC inefficiency
  • Visible condensation on windows or walls
  • Warped or deteriorating shingles

By addressing these issues promptly with proper adjustments to vent placement or design, you can protect both your home’s structural integrity and indoor comfort levels over time.

Ensuring correct roof ventilation during installation may require additional planning upfront but ultimately delivers long-term benefits such as improved energy efficiency and reduced maintenance costs.